How to Sand a Floor for a Professional Finish
One of the many benefits of wooden floors is that they can be sanded down and refinished multiple times over the years, instead of needing replacement. This is extremely beneficial and saves on the cost and hassle of having to replace all the flooring in your home, should any damage occur to them or if you just fancy a change.
Taking the time to sand your own floor can be a very satisfying job. However, you need to use the right tools and products for a professional finish so that you avoid making it into a time-consuming and difficult process.

What Tools Do You Need to Sand a Floor?
Before commencing the process, it is important you have the right tools for the job. Here are the tools we would recommend hiring to tackle your floor sanding project:
Drum Sander: This heavy-duty machine works fast on wooden floors and makes quick work of sanding large spaces. The drum sander has large sheets of sandpaper secured around the drum on the bottom of the machine so that it can sand quickly. What’s more, these pieces of sandpaper can easily be replaced when they become dull and are no longer working to their full efficiency.
Edge Sander: This handheld sander uses a small replaceable disk to sand down areas of your hardwood floors that the drum sander cannot reach. So, around the skirting boards, in tricky corners, and in doorways.
Commercial Vacuum Cleaner: An essential tool when it comes to sanding floors, a commercial vacuum cleaner will help clear up all the sawdust, wood shards, and mess created by sanding.
These tools are essential for sanding a floor and can help you achieve the professional finish you’ve been working for.
Use the Right Sort of Sandpaper
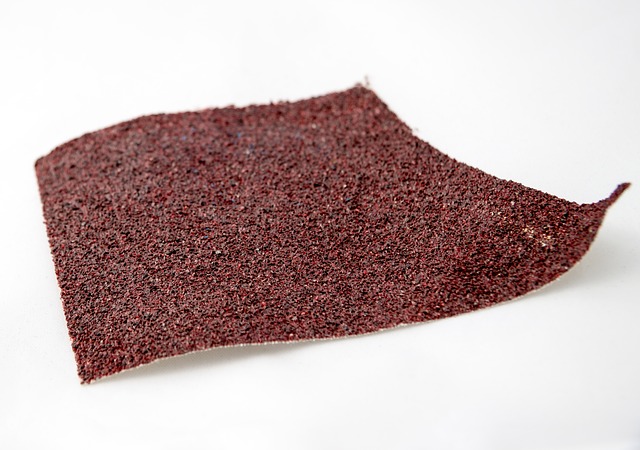
Sanding a floor for a professional finish depends a lot on the type of sandpaper you use. It is best to start by using 120 grit sandpaper as really course sand paper removes all the surface dirt and grime. After most of the dirt has been removed with the coarse sand paper, with each sand you move on to finer paper so that you are both removing and smoothing out the roughness of the wood. This gradual process takes time but really does make your floor much smoother, more professional, and far easier to maintain.

Can I Sand My Floors with a Hand Sander?
While it is possible to sand wooden floors by hand, it would take a huge amount of time and you will also end up going through a ridiculous amount of sandpaper. Often, because of the amount of sandpaper you use, sanding your floors by hand may end up costing you even more than hiring a machine.
How to Sand a Floor: The Step-by-Step Process: Clear the Room of Any Furniture
Before you start sanding your floors, clear any furniture in the room, including decorations, curtains, and other objects that are touching the floor and may interfere with the job. If possible, it is also helpful to remove the door to the room so that you avoid any potential damage. However, if you can’t remove the door it’s not a problem – it would just make the process a little bit easier for you.
Ensure Your Floor is Free from Nails
Before commencing sanding, make sure your floor is completely nail free and flat so that you can create a smooth finish when applying the varnish. To allow for a professional finish, punch every nail of your floorboards into the wood so that it’s about 2mm under the surface, this will allow for easy sanding and a professional finish.

Thoroughly Clean Your Floors
When sanding a floor, if you’re doing the whole house it is best to work in one room at a time, as each room needs to be completely emptied of furnishings and floor coverings. To prepare your space, completely empty out the room, remove old floor coverings, nails and anything else attached to the floor, and then give your floors a thorough clean and vacuum. This will ensure your floors are properly clean before you start working on the sanding.
Close and Seal any Windows, Doors, and Vents
Sanding your floors can be a very dusty process and dust can easily travel around your home, damaging furnishings and polluting the atmosphere. The excess of dust can be dangerous if you have pets or children and cause breathing problems. So, the best way to avoid this is by closing and sealing all windows, doors, and vents. You should also cover any plug sockets and other nooks and crannies to prevent dust from settling and causing a problem.
Wear the Right Protective Gear
Protect your lungs from dust with a mask so that you don’t spend the day coughing. During the job, ensure you wear the appropriate footwear and be careful not to trip over the wire of the sander. It’s also a good idea to wear old clothes that you don’t mind getting dirty because sanding floors is a dusty and messy job best suited to your old clothes.
Don’t overlook the importance of wearing the appropriate protective gear when carrying out any sort of DIY project as it is arguably the most important aspect of any DIY project.
Always Sand with the Grain, Not Against It
When sanding your floors, the most important thing to remember is to sand with the grain and not against it. If you don’t sand with the wood grain, the finished job won’t look professional and unsightly scratches will show up on your flooring. So, always sand with the grain and not against it to avoid these common problems.
We would always recommend using the large drum sander for the main floor area and the floor edging sander for the edges of the room. If you are unsure which type of sander would be best for your space, whether you need both or you could just get away with the one, speak to our team today. Sanding your floors is a job worth completing well, so we would always recommend that you ask if you’re unsure about anything. Our team would be more than happy to help.
Which Grits are Best to Use?
When sanding your floors, there are sandpapers of different coarseness that you need to use. To begin with, use 30-40 grit. This coarse paper is good at the starting point, it better ensures old layers of flooring are removed without over-sanding the wood and causing roughness.
If you want a professionally-finished wooden floor, don’t be tempted to skip the fine sand paper at the end as this sacrifices the neat and tidy finish and ease of maintenance.
Take Your Time Sanding
When it comes to hand-held floor sanders, it’s important to start the sander off slowly and gently on the floor. Sand with the grain, moving the sander very slowly from side to side. Once you make it to the end of the wood strip, turn the sander by moving it in a semicircle and make your way back again.
Vacuuming Up the Dust
Once you’ve finished all the sanding and you’ve given time for the dust to settle, vacuum everywhere. Use the nozzle of the vacuum cleaner to clear out the edges of skirting boards and hard to reach places around your home. Once you’ve removed as much dust as possible, you can wipe the floor with white spirit and leave it to dry out completely.
Finish by Varnishing the Floor
To ensure longevity and a hard, durable finish on your wooden floors, it is essential you varnish them. You can buy a variety of varnishing products that are suited to your requirements and timescale. We would recommend choosing a varnish that provides a clean, satin finish as this ensures shine and glare reduction, providing a more aesthetically-pleasing appearance. What’s more, a satin finish reduces the noticeable appearance of any imperfections.

How to Varnish Your Floor
You should varnish your wooden floor as soon after sanding as you can. To start with, it is important to vacuum and clean away all the dust that has been left behind by sanding the floor. The cleaner the floor, the smoother the varnish finish will be. Next, simply brush the varnish of your choice of the entirety of the floor surface. Again, it is best to varnish in the direction of the grain for the best results. After 48 hours of leaving the varnish to air-dry you can return all your furniture into the room and enjoy your gorgeous new wooden floors.
The Benefits of Wooden Floors
Wooden floors are a popular choice for many homeowners as they have a number of obvious advantages. Not only are wooden floors natural and free from toxins, they are also far easier to clean than carpet as they cannot collect germs and harbour dust mites in the same way carpets can. They are also very easy to maintain, only needing a sweep or a hoover every few days and a wipe down with a wet cloth or mop to keep them clean.
Source Your Sustainable Timber Floors
If you’re shopping for wooden floors, it is always important to consider the environment when sourcing your timber. The best timber on the market comes from sustainable forests, such as those run by the Forest Stewardship Council. Timber source by the FSC is always sustainably sourced, so you can rest assured that your new floors are not harmful to the environment.
Maintain Your Wooden Floors
After all the hard work that went in to sanding and varnishing your wooden floors, it seems a shame to let it go to waste. So, for maximum longevity, regularly vacuum and wipe your floor with a damp cloth to preserve it. This is the only maintenance needed to ensure your floors stay looking new for a very long time.
Ask a Professional for Help
If you’re still unsure about how to sand your floor, you aren’t confident in doing so, or you have further questions, please do not hesitate to ask us for help. Our team can answer your questions, provide you with the best tools for the job, and tell you how to use them properly. Find out how to sand a floor today and produce beautifully sanded and varnished floors that can be enjoyed for many years to come.
